Warning: using Texture Arrays is an advanced topic than requires some programming ability, ability to modify shaders, and a basic technical understanding of rendering.
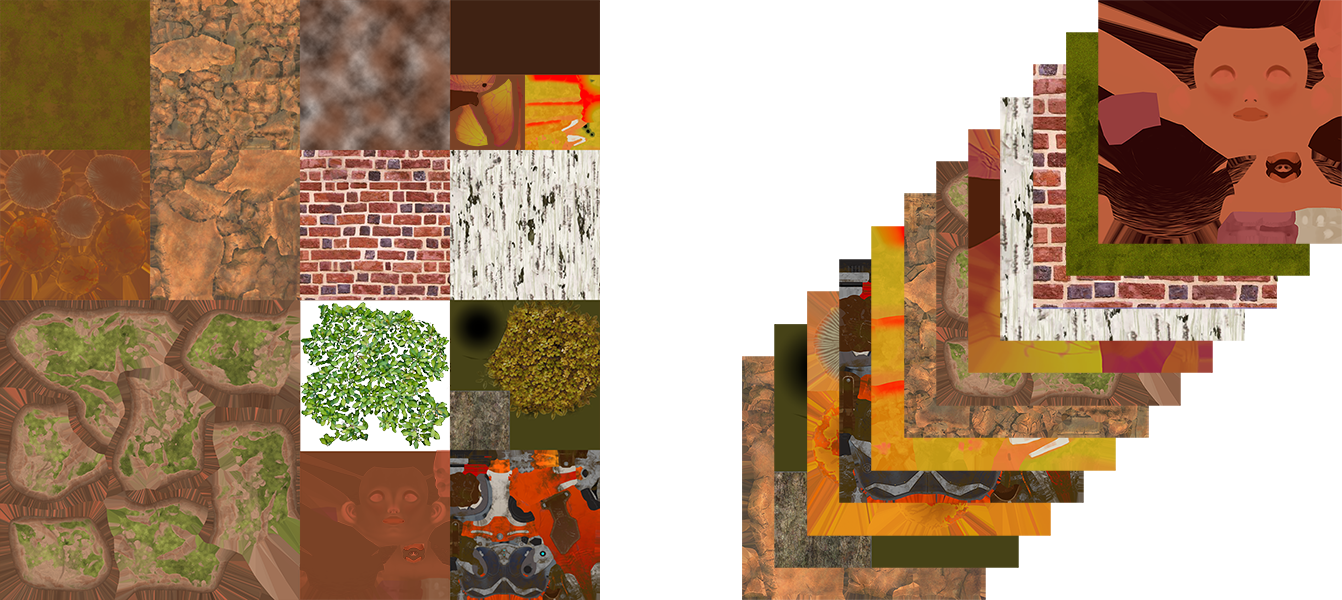
Atlases and Texture Arrays are both “Textures” that contain other textures. Atlases combine textures in a single, larger, texture. Texture Arrays combine textures in a stack of slices like a deck of cards (one texture per slice).
Texture Array assets can be assigned to material properties like regular Texture assets. When a shader samples a Texture Array, an extra “slice” uv coordinate is required to indicate which slice is being sampled.
// sample a regular texture
fixed2 uv = i.uv
fixed4 col = tex2D(_MainTex, uv);


// sample a texture array
fixed sliceIdx = 3;
fixed3 uv = fixed3(i.uv.x, i.uv.y, sliceIdx);
fixed4 col = UNITY_SAMPLE_TEX2DARRAY(_MainTex, uv);
Advantages
- Texture Arrays can pack many more source textures than is possible to pack into Atlases.
- Texture Arrays can support unlimited UV tiling. Atlases cannot tile without baking the tiling (which uses up a lot of space).
Limitations
- All slices must have the same height and width dimension. If a Texture Array contains textures of different sizes (128, 256, 512, 1024, etc) these will all be scaled to the dimensions of the Texture Array. Smaller textures will be scaled up and larger textures will be scaled down. Note that Mesh Baker can pack small textures into a single slice. Each slice can be a small atlas. This can help reduce the size of Texture Arrays.
- When using Texture Arrays in place of Textures, Shaders must be modified. Out-of-the-box Shaders included with Unity will not work.
- Unity does not include a Texture Array importer that will automatically set the correct compression for different platforms. When building for multiple platforms, you may need to bake a separate texture array for each platform with a different compression setting and write a script to assign the correct texture array to materials when building.
- Combining Textures with different channels (eg. RGB, RGBA) may not work well. The same goes for Textures with different filter mode, wrap mode and mip settings. The generated texture array can only have one value for each of these settings.
- Combining source Textures with different compression formats (eg. ETC_RGB vs. ETC_RGBA) can result in combined meshes that look slightly different (the result texture can only have one compression setting).
- Texture Arrays may require the slice index to be inserted into a mesh coordinate. This is difficult to achieve and maintain without a tool like Mesh Baker.
How To Use Texture Arrays
Modifying Shaders To Use Texture Arrays
Using Texture Arrays usually requires two versions of each shader:
- One that uses regular Texture2D so that artists can use regular photo manipulation programs to create and modify Texture assets.
- Another that uses Texture2DArrays for optimizing a scene.
The Unity Manual describes how to modify shaders to use Texture Arrays in the section Texture Arrays. Mesh Baker includes an example:
MeshBaker -> Examples -> UnlitTextureArray
An example Standard Shader that is modified to use Texture Arrays can be found at https://github.com/Phong13/BuiltinShadersTextureArrays. This has been distributed as a .git project so that it is easy to see the modifications that have been made by comparing the current code with the original check-in.
Creating Texture Arrays With Mesh Baker
Typical workflow:
- Add a MB3_TextureBaker to a scene
- Add “Objects To Be Combined”
- Set “Result Type” to “Texture Array”
- “Create Empty Assets For Combined Materials”
- Set the shader on the combined material to the Texture Array version of your shader.
- Map source materials to Texture Array slices
- Create one or more output formats
- Adjust texture baking settings
- Bake the textures
Only steps 5 and 6 are significantly different from the normal Texture baking process.
Map Source Materials To Texture Array Slices
The easiest way to configure slices is to use the button: “Build Texture Array Slices From Objects To Combine”.

For best results, set “Max Atlas Size” to the desired height/width of your Texture Array before using the button. All materials on the source models will be organized into slices. Textures smaller than the “Max Atlas Size” may be grouped into atlas-slices. You can modify the configuration after it has been created or delete the generated slices and re-create them.
The “Report Texture Sizes” button generates a list of all textures used by the slices, their formats, and their sizes. You may choose to remove some objects from the configuration if their textures would be downsized unacceptably, or if they are in a format that is not compatible with other textures due to the wrap mode, channels, compression format, or size.
Slices can contain more than one texture / source material. Slices containing more than one texture will be baked into atlas-slices.
Slices can “Consider UVs”. This can be useful for extracting small parts of a large source atlas if props only use a small part. “Consider UVs” should NOT be used for props with large amounts of UV tiling. Props with large amounts of UV tiling should be put on a slice of their own (that does NOT use “Consider UVs“) so that they are free to tile.
Slices that use “Consider UVs” need a source renderer reference as well as a source material reference.
Create One Or More Output Formats
To get good performance from GPUs it is necessary to compress Texture Arrays. Unfortunately, most platforms require different texture compression formats.
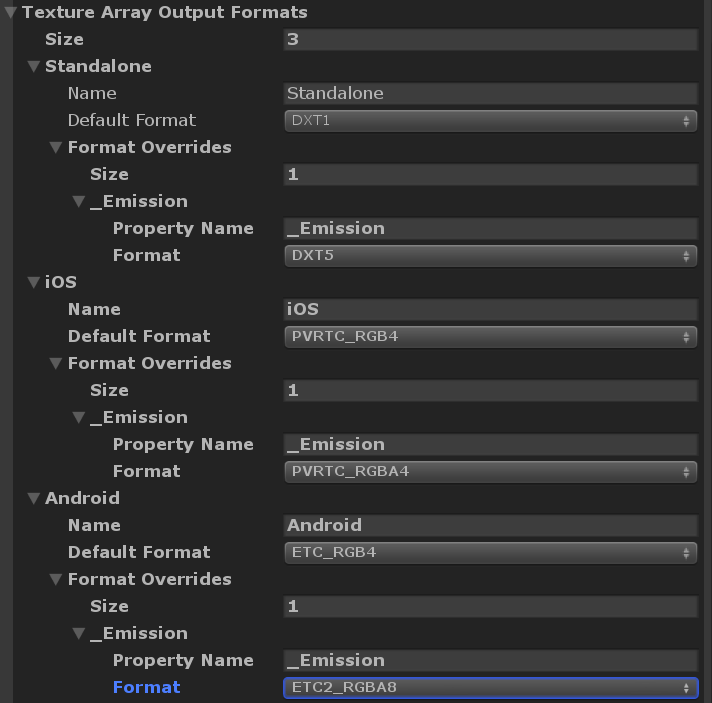
Unity does not provide a way to switch the compression format of a texture array once it has been created. This means that a separate Texture Array must be created for each required compression format / build platform. Mesh Baker lets you define a set of formats. A copy of the Texture Array is generated for each format. Assign a “Name” (usually be the name of the build platform) for each format.
Sometimes there is a need to override the format for some material texture properties. For example, most of the texture properties of the Standard shader need three channel textures (RGB). However, the Emission texture property requires a fourth Alpha channel (RGBA ). This can be handled by providing a format override for the Emission property.
An example format setup for this might look like:
Modifying Meshes To Use Texture Arrays
How will different meshes know which slice(s) to use in the Texture Array? The easiest solution is to embed the slice-index into the baked mesh. The slice-index can be added as a UV coordinate, as a vertex colour, or as another unused mesh coordinate. Mesh UV channels can have an additional (z) coordinate that can store the slice index. One advantage of this technique is that submeshes (multiple materials) can be collapsed into a single sub-mesh / material. Each triangle can sample a different slice.
Note that it is also possible to use GPU instancing and to assign slice-indexes to instanced material properties. However, this technique is too advanced to explain here, and does not handle collapsing submeshes (multiple materials).
Encode The Slice Index Into The Baked Mesh
The slice-index can be assigned to a mesh’s UV coordinates, Vertex Colors, or other unused channel.
Mesh Baker includes a script that will bake the slice-index into the UV.z coordinate. You can also create a custom script that will plug into Mesh Baker to assign the slice-index to a custom mesh coordinate.
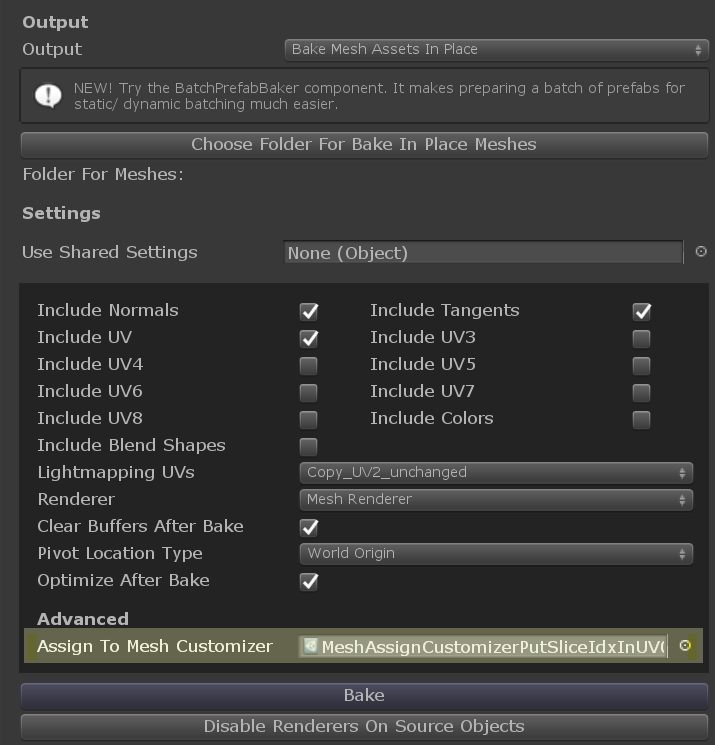
To use the script included with Mesh Baker, create a “Mesh Customizer” asset that will assign the slice-index to UV0.z using the project view context menu:
Create -> Mesh Baker -> Assign To Mesh Customizer -> Put Slice Index In UV0.z
This will create a new asset in the project. Drag this asset to the MB3_MeshBaker(inspector) -> Assign To Mesh Customizer field.
To create a customizer script, look at the included example scripts in the AssignToMeshCustomizers folder (example: CustomizerPutSliceIndexInUV0_
Switching Texture Arrays When Building For Different Platforms
Each Platform (OSX, Windows, Android iOS etc) uses different texture compression formats. Unlike regular Textures, Texture Array assets in Unity do NOT automatically switch compression format when the build platform is switched. If you are using Texture Arrays and the project supports multiple platforms, you will need to write a custom build script that will switch Texture Arrays when creating a build or creating asset bundles.
Here is some example code that uses the data stored in the TextureBakeResult to switch Textures Arrays on a combined material. This code must be in an Editor folder or an Editor Assembly.
using UnityEngine;
using UnityEditor;
using UnityEditor.Build;
using UnityEditor.Build.Reporting;
using DigitalOpus.MB.Core;

class MyCustomBuildProcessor : IPreprocessBuildWithReport
{
  public int callbackOrder { get { return 0; } }

  public void OnPreprocessBuild(BuildReport report)
  {
    Debug.Log("Running custom build script");

    // References to TextureArrays
    // in all the formats are stored
    // in the TextureBakeResult.

    // Load a TextureBakeResult.
    // It would be better
    // to store a list of
    // TextureBakerResults in a
    // ScriptableObject asset and process
    // each of those instead of loading from
    // a hardcoded path

    string pathToTextureBakeResult = "INSERT PATH HERE";
    MB2_TextureBakeResults bakeResult =
      AssetDatabase.LoadAssetAtPath(
          pathToTextureBakeResult);

    ProcessTextureBakeResult(bakeResult);
  }

    void ProcessTextureBakeResult(
      MB2_TextureBakeResults bakeResult)
    {
      BuildTarget buildTarget =
         EditorUserBuildSettings.activeBuildTarget;

    Debug.Assert(bakeResult.resultType ==
        MB2_TextureBakeResults.ResultType.textureArray);
    // Visit each Combined Material in the Texture Bake Result
    foreach (MB_MultiMaterialTexArray resMat
          in bakeResult.resultMaterialsTexArray)
    {
      // Visit each texture property
      // in the combined material
      foreach(
          MB_TexArrayForProperty texProperty in
          resMat.textureProperties)
      {
        Texture2DArray ta = null;
        // Get the texture array
        // in the format matching the platform
        // For this to work we need the
        // "name" of the format to match the
        // build platform.
        bool foundAPlaform = false;
        foreach (MB_TextureArrayReference format in
            texProperty.formats)
        {
            if (format.texFromatSetName.Equals(
                buildTarget.ToString()))
            {
                foundAPlaform = true;
                ta = format.texArray;
                break;
            }
        }

        if (foundAPlaform)
        {
          resMat.combinedMaterial.SetTexture(
            texProperty.texPropertyName, ta);
        } else
        {
          Debug.LogError(
              "Could not find a TextureFormat entry" +
              "Matching platform '" +
                buildTarget.ToString() + "'" +
              " Names must match exactly.");
        }
      }
    }
  }
}